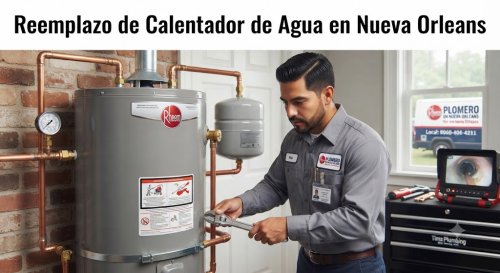
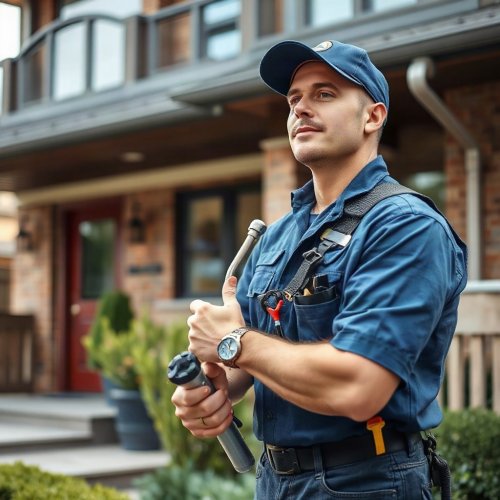
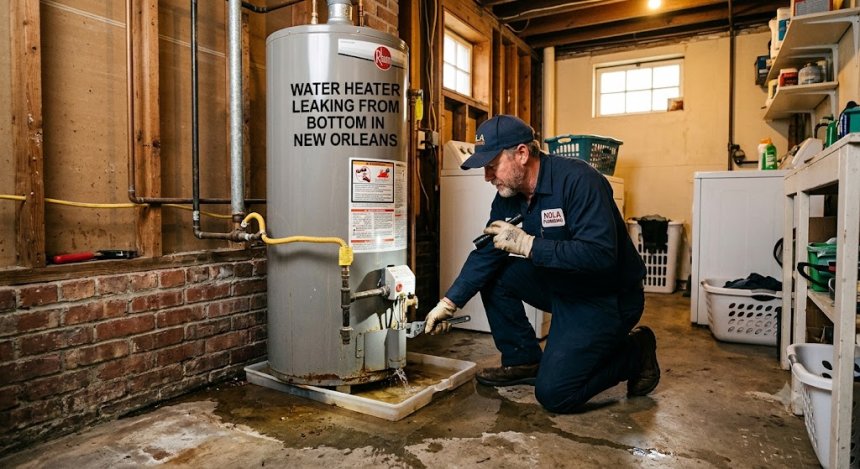
Water Heater Leaking From Bottom in New Orleans
Is your water heater leaking from the bottom in New Orleans? Discover common causes, safety steps, repair processes, and when to call a pro.
Why Is My Water Heater Leaking From the Bottom in New Orleans?
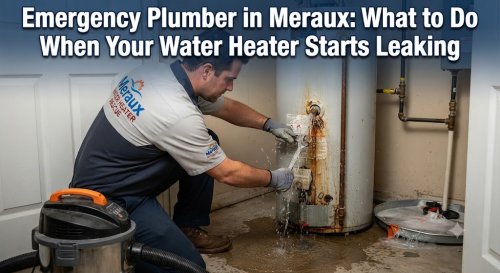
Discovering a pool of water gathering beneath your hot water tank is one of the most stressful experiences a homeowner or business owner can face. Whether you live in a historic home in the French Quarter, a raised cottage in Mid-City, or run a commercial shop in Metairie, water heater failures happen when you least expect them.
New Orleans brings a unique combination of high humidity, mineral-heavy municipal water, and older home plumbing configurations that put heavy stress on water heating equipment. When water collects around the base of your unit, it is crucial to address it right away. Ignoring a minor puddle today can lead to major structural water damage, ruined flooring, mold infestation, and expensive emergency restoration costs tomorrow. Homeowners search for this topic because they need immediate answers: Is this an easy valve fix, or is the inner tank ruined? This guide covers everything you need to know about diagnosing, handling, and resolving a bottom leak on your water heater.
What Is a Bottom Water Heater Leak?
A water heater leaking from the bottom occurs when moisture pools around the base or drops directly from the lower components of the unit. While it may look like the steel body itself is leaking, water can originate from several distinct locations near the bottom:
-
Internal Tank Fractures: Cracks inside the glass-lined steel inner tank caused by sediment buildup, thermal expansion, or age.
-
Drain Valve Leaks: Drips originating from the plastic or brass hose bib located near the bottom of the tank.
-
Temperature and Pressure (T&P) Relief Valve Discharge: Excess pressure or heat causing the relief valve line to discharge water toward the bottom pan.
-
Heating Element Gaskets: On electric units, worn rubber gaskets around the lower heating element can allow water to seep out.
-
Condensation: Heavy humidity during New Orleans summers causing external moisture to run down the tank shell, mimicking a real leak.
Symptoms range from a tiny puddle sitting in the drain pan to an active, steady stream running across your basement, utility closet, or laundry room floor.
Why Does This Plumbing Problem Happen?
Water heaters work continuously under intense heat and pressurized conditions. Over time, physical wear and environmental factors combine to cause leaks.
1. Sediment Accumulation & Hard Water Corrosion
Greater New Orleans tap water carries dissolved minerals. Over years of heating, these minerals settle at the bottom of the tank as hard sediment. This buildup forms an insulating layer over gas burners or electric heating elements, overheating the metal tank floor. The metal expands and contracts unevenly, weakening the glass lining and causing the steel shell to rust and crack.
2. Excessive Water Pressure
High water pressure in local municipal lines exerts strain on internal tank seams. When pressure routinely spikes above 80 PSI without an expansion tank or pressure-reducing valve, the inner lining suffers microscopic stress fractures.
3. Thermal Expansion
As cold water heats up, it expands. In closed plumbing systems, this expansion increases internal pressure. If your system lacks a properly calibrated expansion tank, that extra force forces water out through relief valves or internal tank welds.
4. Age and Deterioration
Standard tank-style water heaters generally last between 8 and 12 years. As anode rods deplete—the sacrifical components designed to attract rust away from the tank—corrosion attacks the main steel walls instead.
5. Faulty Drain Valves
The lower drain valve is used to flush sediment out of the heater. Plastic factory valves can degrade, crack, or fail to seal completely after a routine flush.
Signs You Should Never Ignore
-
Standing Water Around the Base: Any standing puddle, even a small one, indicates an active or developing failure.
-
Discolored or Rusty Water: Brownish water flowing from your hot taps indicates severe internal corrosion inside the tank shell.
-
Strange Popping or Rumbling Noises: Loud popping sounds mean heavy sediment is boiling against the tank floor, pushing the unit toward premature failure.
-
Low Hot Water Pressure: Reduced flow from hot faucets points to heavy mineral buildup or internal line obstruction.
-
Unexplained Spike in Utility Bills: Constant running gas or electric burners trying to heat leaking water will dramatically increase monthly utility costs.
-
Damp Walls and Mold Growth: Persistent moisture inside water heater closets creates an ideal environment for toxic mold within 24 to 48 hours.
Common Plumbing Problems Related to This Issue
-
Slab Leaks: Water pooling around floor slabs can migrate downward, eroding soil and damaging foundation structures.
-
Pipe Joint Failures: High system pressure that forces water heater leaks often damages flex lines, copper joints, and shut-off valves throughout the house.
-
Sewer and Drain Backups: If floor drains or drain pans are clogged with debris, leaking water heater discharge cannot escape properly, resulting in local flooding.
-
Water Heater Component Burnout: Leaking water from upper fittings or element gaskets short-circuits electrical thermostats and heating elements.
Step-by-Step Professional Repair Process
When a licensed plumber evaluates a leaking water heater, they follow a systematic process to ensure property safety and long-term performance:
-
Step 1: Complete System Inspection
The plumber inspects top connections, heating elements, relief valves, and lower components to trace the precise source of the water.
-
Step 2: Source Diagnosis
By isolating condensation and valve drips from true tank fractures, the technician determines whether the unit can be safely repaired or requires full replacement.
-
Step 3: Upfront Estimate
You receive a clear, itemized breakdown explaining the necessary repairs, replacement options, materials, and labor fees before work begins.
-
Step 4: System Isolation & Drain
The technician shuts off the gas supply or circuit breaker, closes the cold water inlet valve, and drains the remaining tank capacity through a heavy-duty discharge hose.
-
Step 5: Repair or Unit Replacement
Faulty valves, gaskets, or lines are replaced using commercial-grade parts. If the internal tank is cracked, the old unit is disconnected, safely removed, and a new energy-efficient water heater is installed to local plumbing code.
-
Step 6: Testing & Calibration
The plumber refills the system, purges air lines, checks for pressure tight seals, tests heating cycles, and sets safe thermostat limits (typically 120°F).
-
Step 7: Job Site Cleanup & Maintenance Education
The work area is thoroughly cleaned, and the plumber provides customized maintenance instructions to help maximize the life of your unit.
Can You Fix It Yourself?
Safe DIY Steps
If you notice a leak, taking these temporary safety precautions can protect your home while waiting for a professional:
-
Turn off the power or gas: For electric models, turn off the breaker. For gas models, turn the gas control knob to "OFF" or "PILOT."
-
Shut off the water supply: Turn the cold water inlet handle located at the top right of the tank clockwise until tight.
-
Wipe up standing water: Prevent wood rot and subfloor damage using towels, buckets, or wet/dry vacuums.
-
Check the drain valve handle: Ensure the hand wheel or slot on the lower valve is closed tight.
When DIY Becomes Dangerous
Never attempt to unbolt heating elements, tamper with gas supply lines, or plug a leaking T&P valve yourself. Water inside the tank is under high pressure and intense heat—scalding water can cause severe injury. Furthermore, plugging a pressure relief valve converts your water heater into a severe safety risk. Internal tank cracks cannot be patched or welded safely.
Tools Professionals Use
To ensure absolute accuracy, licensed plumbing technicians rely on advanced tools:
-
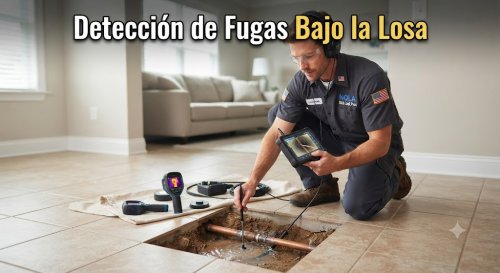
Digital Thermal Cameras: Pinpoint hidden moisture leaks behind closet walls and insulation jackets.
-
Water Pressure Gauges: Test incoming city line pressure to identify system pressure surges.
-
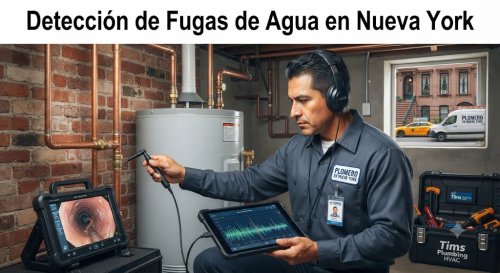
Electronic Leak Detectors: Identify tiny pinhole leaks in concealed feed lines.
-
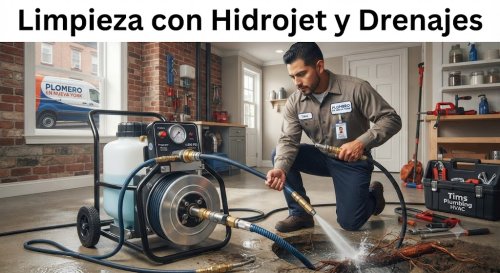
Commercial Hydro Jetting & Flush Tools: Blast out hardened mineral scale and heavy bottom sediment during maintenance servicing.
-
Pipe Inspection Cameras: Examine attached drainage lines for blockages or corrosion.
How Long Does the Repair Usually Take?
-
Simple Valve or Gasket Replacement: 1 to 2 hours.
-
Thermostat or Heating Element Repair: 1.5 to 2.5 hours.
-
Full Tank Replacement (Standard Unit): 3 to 5 hours.
-
Complex Commercial or Custom Relocations: 4 to 8 hours.
Timeframes vary based on accessibility (e.g., tight attic spaces vs. open utility rooms), local code requirements, and the age of the existing piping.
Cost Factors
Every plumbing scenario presents different variables. Instead of fixed flat rates, final repair or replacement costs depend on several key factors:
-
Diagnostic Fees: Standard evaluation charges covering technician time and travel.
-
Parts and Component Quality: High-grade brass valves and factory heating elements vs. standard hardware.
-
Labor Intensity: The time required to access, drain, hoist, and connect the plumbing fixtures safely.
-
Emergency Service Charges: After-hours, weekend, or holiday dispatch calls.
-
Permit and Code Requirements: Local city permits and required safety additions (such as expansion tanks or drain pans).
-
Repair vs. Replacement: Replacing minor external fittings cost far less than full tank replacements.
Plumbing repair costs vary depending on the severity of the problem, accessibility, materials required, emergency service, property type, and local labor rates.
Hidden Truths Homeowners Should Know
-
Small Leaks Quickly Become Expensive Disasters: A slow 5-gallon-per-day leak will rapidly rot wooden subflooring, wreck baseboards, and damage ceilings below.
-
Cheap Temporary Fixes Almost Always Fail: Epoxy putty, pipe wrap tapes, or sealants applied over tank cracks will fail under thermal expansion and water pressure.
-
Home Insurance May Reject Neglected Claims: Most insurance providers deny water damage coverage if the adjuster determines a leaking tank was visibly corroded and neglected for months.
-
Sediment Acts Like Insulation: Allowing sediment to build up causes your energy bills to rise steadily long before the tank structurally bursts.
-
Hard Water Drastically Reduces Lifespan: Without regular flushing, hard mineral content reduces an 10-year tank to a 5-year failure.
-
Mold Develops in 24 to 48 Hours: Standing water in humid New Orleans utility spaces triggers aggressive mold growth within two days.
15 Common Mistakes Homeowners Make
-
Ignoring Minor Drips: Assuming a small puddle in a drain pan will simply evaporate.
-
Capping Off a Dripping T&P Valve: Blocking a relief valve deprives the tank of its primary safety release mechanism.
-
Cracking Plastic Drain Valves: Using heavy metal wrenches on fragile plastic drain threads, snapping them completely.
-
Setting Thermostats Too High: Setting temperatures above 120°F accelerates internal tank corrosion and increases scalding risks.
-
Draining a Hot Electric Tank: Draining the unit before turning off the power panel burns out heating elements in seconds.
-
Skipping Annual Flushing: Neglecting to flush out mineral scale once a year.
-
Forgetting Anode Rod Checks: Letting the sacrificial anode rod wear down completely, leaving the main tank walls unprotected.
-
Hiring Unlicensed Contractors: Working with uncertified labor who ignore local safety codes and plumbing standards.
-
Ignoring High Municipal Water Pressure: Failing to install a Pressure Reducing Valve (PRV) when main pressure exceeds 80 PSI.
-
Using Rigid Connections Without Expansion Tanks: Omission of expansion tanks on closed-loop municipal supplies.
-
Over-Tightening Pipe Fittings: Stripping threads or cracking brass connections by applying excessive force.
-
Mixing Dissimilar Metals Direct: Connecting copper directly to galvanized steel without dielectric unions triggers galvanic corrosion.
-
Placing Units Directly on Bare Concrete: Omitting insulating pads or drip pans beneath floor-mounted water heaters.
-
Delaying Replacement: Attempting repeated costly repairs on a rusty, 12-year-old tank that needs replacement.
-
Overlooking Drain Line Clearances: Allowing the discharge line from the relief valve to slope upward or become blocked.
Practical Maintenance Tips
-
Flush Your Tank Annually: Connect a hose to the lower drain valve every 12 months to clear out settled mineral sediment.
-
Test the T&P Valve: Gently lift the lever on the pressure relief valve once a year to ensure it discharges and seals back smoothly.
-
Inspect the Anode Rod: Check the rod every 2 to 3 years; replace it promptly if more than 6 inches of core wire is exposed.
-
Set Temperatures to 120°F: Keeps energy costs down and slows mineral calcification rates inside the tank.
-
Maintain 2 Feet of Clearance: Keep boxes, paint cans, and household chemicals away from gas water heater burners and tanks.
-
Install a Drip Pan with a Drain Line: Route pan lines to an outside drain or floor drain to collect accidental spills.
-
Check Water Pressure Regularly: Ensure indoor household pressure remains between 45 and 65 PSI.
-
Insulate Exposed Pipes: Wrap exposed cold and hot water feed lines to reduce condensation and heat loss during winter snaps.
-
Check Gas Flex Lines: Look for signs of wear, kinks, or corrosion on yellow gas connectors.
-
Install a Smart Leak Alarm: Place a low-cost battery moisture sensor inside the drain pan for early warning notifications.
-
Inspect Heating Element Seals: Check electric element gaskets annually for signs of moisture crusting.
-
Verify Venting Drafts: On gas units, check that exhaust flues vent combustion gases safely outside.
-
Keep Floor Drains Clear: Ensure nearby utility floor drains are free of dust, lint, and storage obstructions.
-
Replace Plastic Drain Valves: Upgrade factory plastic drain valves to solid brass ball valves for better seal security.
-
Schedule Professional Inspections: Have a licensed technician conduct a full plumbing system checkup every two years.
When Should You Call an Emergency Plumber?
Immediate professional service is vital if you experience any of the following scenarios:
-
Active Gushing Water: Water is leaking rapidly from the tank shell, pan, or feed lines, creating an immediate flood risk.
-
Gas Odors Near the Unit: The smell of rotten eggs (natural gas leak) around gas burner controls.
-
Smoking or Scorched Electrical Wiring: Burning smells or melted insulation near electric thermostat covers.
-
Total Loss of Household Water: Shutting down your main valve due to a massive heater leak deprives your home of running water.
-
Water Dripping Through Ceilings: Water pooling in upper floors and seeping down into lower-level living spaces.
In emergency situations, quick action prevents thousands of dollars in structural restoration expenses.
Frequently Asked Questions
Why is my water pressure suddenly low?
Sudden pressure drops are often caused by heavy mineral blockages inside main plumbing lines, a failing pressure-reducing valve, or an undetected main pipe leak.
Can a clogged drain damage pipes?
Yes. Clogs cause water pressure to build up behind the blockage, putting severe stress on pipe joints and leading to leaks or complete pipe breaks.
How do I know if my water heater tank is broken beyond repair?
If water is leaking directly through the steel outer jacket or rusted bottom rim—rather than a threaded valve or fitting—the inner tank has failed and requires replacement.
How long do standard water heaters usually last?
Conventional tank water heaters typically last between 8 and 12 years depending on water quality, maintenance frequency, and pressure levels.
Why does my water heater make loud popping noises?
Popping sounds occur when steam bubbles force their way through heavy layers of mineral sediment settled at the bottom of the tank floor.
Can plumbing leaks increase my water bill?
Absolutely. Even a minor trickle can waste hundreds of gallons of water per month, leading to a noticeable increase in monthly utility charges.
Is standing water in the drain pan always a serious emergency?
Not always, but it requires prompt attention. It could be a simple dripping drain valve or condensation, but it often signals a failing inner tank shell.
What causes a temperature and pressure (T&P) valve to leak?
T&P valves leak when water pressure spikes too high, water temperatures exceed safe limits, or the internal valve spring becomes worn out by mineral scale.
When should I replace my water heater instead of repairing it?
If your unit is over 10 years old, experiencing structural tank leaks, or requiring frequent costly repairs, full replacement is the most cost-effective option.
Can hard water ruin a new water heater quickly?
Yes. Untreated hard water leaves thick scale deposits that burn out heating elements, block valves, and corrode inner steel tanks prematurely.
Voice Search & Common Questions
-
"Who fixes water heaters near me in New Orleans?"
Licensed local plumbers handle diagnostic, maintenance, component repair, and full tank replacement services for residential and commercial systems.
-
"Why is water pooling around my hot water heater?"
Water pooling around the base usually stems from a failing internal tank lining, a loose drain valve, a leaking T&P line, or worn heating element gaskets.
Why Choose Plumber in New Orleans?
When you need fast, dependable plumbing services, Plumber in New Orleans delivers high-quality craftsmanship and trustworthy care tailored to local homes and businesses.
-
Experienced Licensed Plumbers: Fully trained, certified, and knowledgeable about local building codes and historic home plumbing requirements.
-
Upfront Estimates & Honest Advice: Clear, straightforward pricing options without hidden fees or high-pressure sales tactics.
-
Rapid & Emergency Response: Fast turnaround times when plumbing emergencies put your property at risk.
-
Comprehensive Service Area: Serving Orleans Parish, Jefferson Parish, and surrounding communities including Metairie, Kenner, Gretna, Harvey, Marrero, Chalmette, Algiers, Downtown, Mid-City, Uptown, and the French Quarter.
-
Quality Workmanship & Modern Tools: Utilizing advanced diagnostic cameras, pressure meters, and commercial repair tools to get the job done right the first time.